

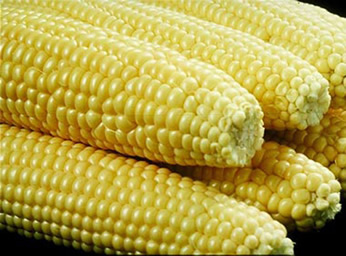
Sweet Corn
Sweet corn is probably one of the most rewarding home crops you can grow. There is no comparison between homegrown sweet corn and that bought in the market. However, you must follow a few basic rules:
- Corn is wind pollinated and must be planted in blocks of several short rows (not one long row)
- Corn is a grass and must have plenty of nitrogen and water, similar to your lawn.
- You need to familiarize yourself with timing and planting of the super-sweet varieties.
Space is the drawback most people think they have for planting corn. I have grown 30 plants in a block 4' x 6' and harvested 60 ears of corn. It is certainly not an ideal spacing, but it can be done.
Preparation: All types of corn need sun and fertile soil. Turn and amend soil well in advance of planting so the soil will settle and warm up. Soil temperatures should be between 60 and 65 degrees for standard sweet corn and between 75 and 80 degrees for the super-sweet varieties. One disadvantage of the super-sweet varieties is less vigor in the seed due to the higher sugar-to-starch ratio. The result is slow germination unless soil is warm and moist. Incorporate 2 pounds of 10-10-10 fertilizer per 100 square feet before planting on soil with low to moderate fertility.
Plant seed 6 to 8 inches apart, one inch deep, and thin to 10 - 12 inches when the plants are 4 - 5 inches tall. It is better to plant thickly and thin more, than to have spotty rows and lose time in replanting. Be sure soil is moist before planting. Inland, April 15 to May 1 is about right for planting. In gardens closer to the coast, wait as much as another month for more sunlight. On a year of wet and prolonged overcast, you can modify soil temperatures by covering the rows with clear plastic tunnels. Or after planting, lay row cover cloth (like Reemay) over the soil until the seed is up and growing well. If you want to grow more than one variety, plan on sowing seed at two to three week intervals.
If you plant different types try to make sure they don't tassel within 10 days to 2 weeks of each other so pollen won't be viable, one to the other, either by time or distance. Some publications say 25 feet between varieties, and some say 75 feet. In a small backyard garden, the safest way is to plant only one variety and stagger planting for extended harvest. Try a new variety each year!
Growing Needs
Corn grows fast once warm weather sets in. It needs plenty of water 2 or 3 times a week during the hot spells through July, August and September. Another time of high water need is during tasseling and as silks appear. Visual signs of water stress are leaves curling at the edges, looking limp and dull green. Additional fertilizer containing nitrogen during growth is also necessary unless you have been using large amounts of compost and manure in previous years. A sign of nitrogen deficiency is yellowing leaves and bottom leaves that dry up before tassels form. Side dress with a nitrogen fertilizer like ammonium nitrate 4 to 6 inches from plants at 1/2 pound per 25 feet of row when plants are 8 - 10 inches tall and again when plants are 24-30 inches tall. Other organic fertilizers include manure or blood meal (slower acting).
There is no need to pull off suckers (the stalk that sprouts from the bottom of the plant) as long as you have spaced the plants 10 - 12 inches apart. They can give you an extra ear of corn. Field testing has proven the extra leaves are an advantage.
"Hilling-up" corn is not necessary on short compact plants or if your garden is protected from wind. If you need to deepen the irrigation furrows after the corn is 3 - 4 feet tall, and you have left enough room between rows to borrow soil from the aisles, there isn't any reason you shouldn't hill-up the plants: Pull soil from the outer edges of the rows to cover corn stalks and roots at the soil line to stabilize the plants from prevailing wind. If you are using drip lines, make sure the corn roots don't grow over your line and pinch it off.
Problems
The biggest insect problem is the corn earworm that also attacks tomatoes (tomato fruitworm). The adult is a night flying moth. If you use a product containing the bacterium Bacillus thuringiensis, (Bt), you must apply it before larvae enter the ear of corn. The immature worm must ingest the material to be effective. Start dusting or spraying with Bt at 2-3 day intervals when tassel begins to form and silks first show. If you use mineral oil on the ear tip, only apply it after the silks have wilted or you may interfere with pollination.
Cut worms can be a problem some years, damaging seed and seedlings. The adult is also a night flying moth that lays eggs in the soil around plants. The larvae feed at night and stay an inch or two below the soil surface during the day. Sprinkle garden-type diatomaceous earth on soil around plants. Look for worms early in the morning around the base of the cut plant. Aphids and ants can cause problems in mid and late summer. If you see ants running up your plants, look for aphids on the back of the leaves. Soap sprays will not keep aphids under control if you have ants in the plants. Use ant bait stations.
There are several other corn diseases that are only occasionally a problem. Corn smut is a fungus in the soil that may affect ears and tassels. The fungal spores that develop in corn husks and sometimes in the tassel stalk are visible as a strange growth called a 'gall'. It will turn dark as the spores ripen and then the gall will expel spores that settle on the ground for the next year. In some cultures the immature gall is eaten. There is no control other than carefully bagging the galls before the spores spread. Dispose in the trash, not the compost pile.
Fusarium ear rot is seen after the corn is husked. A pink mold may be between the kernels or appear in areas of corn earworm damage. Wet humid weather contributes to the disease. Several other diseases occur on commercial crops. If you have any unusual symptoms on your sweet corn, take a sample to the County Agricultural office for identification.
Harvest
Within a week of the stated maturity date, start checking some of the largest ears. Do not pull husk down from the top, as worms have easy access. Rather, open a small slit on the side of the ear with your thumb nails and check the kernels by puncturing one about mid-way down the cob. The liquid should be milky white. The silk should be wilted and turning brown. One can also feel the outer husk for full firm ears - they should not feel spongy. Don't worry about kernels being filled out to the tip of the cob. In some varieties, if you wait for this to happen, the rest of the kernels will be over-matured.
The old adage about starting the cooking water to boil before picking the corn is no longer necessary with newer varieties. The ears can be left on the plant or in the refrigerator for 7 to 10 days and still be crisp, tender and have excellent flavor. Some people find supersweets lacking in true corn flavor and it is best to do some taste testing to find your own preference. Plants are generally more compact, 4 to 6 feet tall, though the variety Kandy Korn is over 6 feet tall. If you have an 8 x 10 foot area, you can grow a block of corn with plenty of room for aisles and irrigation furrows.
Corn Earworm Control Without Synthetic Pesticides
By Richard Smith, UC Farm Advisor

Corn earworm, Heliothus zea, is a troublesome pest on sweet corn. The female moth lays her eggs on the fresh silks of the corn. The young worm feeds on the silks before entering the tip of the ear, and once in the ear the worm continues to feed on the kernels and develop, thereby rendering the ear undesirable to consumers. Controlling the corn earworm is of utmost importance, but growers who are growing sweet corn without the use of synthetic pesticides are left with fewer satisfactory options. I will discuss each of the options below and evaluate their relative merits.
1. Cutting the ends off the ears: In this case, no attempt is made to control earworm during the season, and any damage inflicted is simply cut off and disposed of. This technique is used successfully by some growers, but the main issue is how the ears are marketed. Many wholesalers will not accept ears with the tips cut off; however, this technique finds more acceptance in direct marketing channels.
2. Mineral oil, which is injected into the tip of the ear as the silks first begin to dry, offers excellent control of corn earworm. The principle drawback of this technique is that it is tedious and laborious. The silks dry down unevenly to the proper stage for application of the oil and, as a result, repeat applications are necessary.
3. Of all the various botanical insecticides, pyrethrum holds the most promise of offering control of the corn earworm. Unfortunately, it has little residual action and rapidly breaks down in sunlight. It would probably need to be sprayed almost daily to offer good control.
4. Bt materials (with the bacterium Bacillus thuringiensis) have been known for a long time to be effective against corn earworm: however, they must be sprayed frequently (every 2-3 days) as they quickly break down in sunlight, and good coverage of the silks is essential since the young emerging worm needs to eat the spray material before entering the end of the ear.
Also check out ...
UC websites for the Vegetable Research and Information Center (http://vric.ucdavis.edu) and Integrated Pest Management (www.IPM.ucdavis.edu).