

Hydroponic gardening with the Kratky method ideal for small spaces

Roots will continue to grow reaching down toward the water in your container. (Leslie Crawford)
Hydroponic gardening with the Kratky method ideal for small spaces
Simple, easy-care system suspends roots in a nutrient solution
By Leslie Crawford
(This article originally appeared inb the September 13, 2025 edition of the San Diego Union-Tribune)
Have you ever pulled a store-bought bag of lettuce from the fridge only to find it wilted and long past its prime? Haven’t we all! It’s wasteful and expensive and I decided something needed to change.
I wanted to grow my own lettuce, and the Kratky method of hydroponics turned out to be the perfect solution.
Developed in 2004 by Bernard Kratky, Ph.D., a horticulturist at the University of Hawaii, the Kratky method is a simple, noncirculating, hydroponic way to grow plants. It requires no electricity or pumps. Plants are placed in net pots that sit in a lid with their roots suspended in a nutrient solution. The lower portion of the roots absorbs water and nutrients, while the upper portion remains in an air gap, allowing roots to draw in oxygen for the plant.
This low-maintenance method doesn’t take up much space, making it ideal for small yards, patios or balconies. Once it’s set up, it requires very little attention.

All you need for your Kratky kit are a container — net pots — and clay pebbles. (Leslie Crawford)
What you’ll need to get started:
• A watertight, opaque container with a lid
• Slotted net pots
• Porous clay planter pebbles
• Nutrient solution
Your container should be dark or blacked out to prevent algae growth. I used 12-gallon black tubs with yellow lids left over from a move. My husband drilled holes in the lids to fit the net pots. You can also buy 5-gallon buckets with pre-made lids with built-in net pots at some garden centers, a quick and easy way to get started.
Net pots are plastic containers with slits that allow roots to grow through. Clay planter pebbles, often used in hydroponics, are porous to draw water up to the seeds and keep the environment moist but not soggy. You can optionally use sterilized soil or peat pellets, but they’re not required.
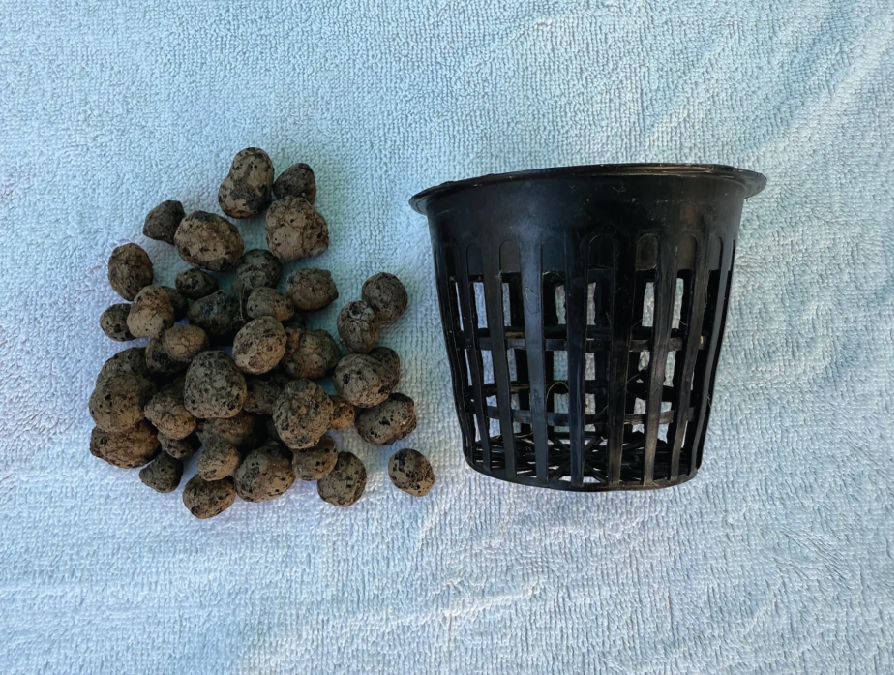
Porous clay pebbles and a net pot provide the environment for your seeds to grow. Misting daily is advised. (Leslie Crawford)
Planting methods
I experimented with three planting methods:
Clay pebbles only: I pre-moistened the pebbles before placing the seeds so they would stick to the pebbles, hopefully to prevent them from falling through the pot. The pebbles drew water up to keep the seeds moist until they sprouted.
Clay pebbles plus soil: I added a small layer of sterilized soil on top of the pebbles and misted it before adding the seeds to help jumpstart germination.
Peat pellets: I started the seeds in peat pellets and, once sprouted, placed the pellet into the net pot on top of the clay pebbles, then filled in around the edges with more pebbles to keep the seedlings cozy and protected.
When using the clay pebbles with and without soil, I misted each cup daily until I saw sprouts forming. All three planting methods yielded similar results.
Nutrients and watering
After placing the net pots in the lids, I filled the containers with water, mixing in a balanced, water-soluble fertilizer that includes macro and micronutrients. A knowledgeable garden center employee can guide you on what to buy and how much to use.
Fill with water to reach only the bottom third of the net pots, leaving two inches of air space above the water. As the plant grows, the roots reach downward toward the water. Over time, the water level will drop, but the expanding root system will continue to grow and absorb what it needs.
I experimented with my planting, adding nutrients to three containers and planting one container without nutrients for comparison. The difference was stark. The fertilized bins produced healthy, lush lettuce and arugula, while the unfertilized container didn’t produce much worth harvesting.
The Kratky method works best for short-term crops like leafy greens and herbs. From planting to harvest, my lettuce took about a month. After two months, I emptied and cleaned the pots, lids, and containers for the next round.
I had great success with several lettuce varieties. Arugula was especially satisfying because it grew easily and stayed sweet and mild. Basil thrived too; it was the best I’ve ever grown. Spinach didn’t do very well, but I’ll try again. Cilantro is next on my list.
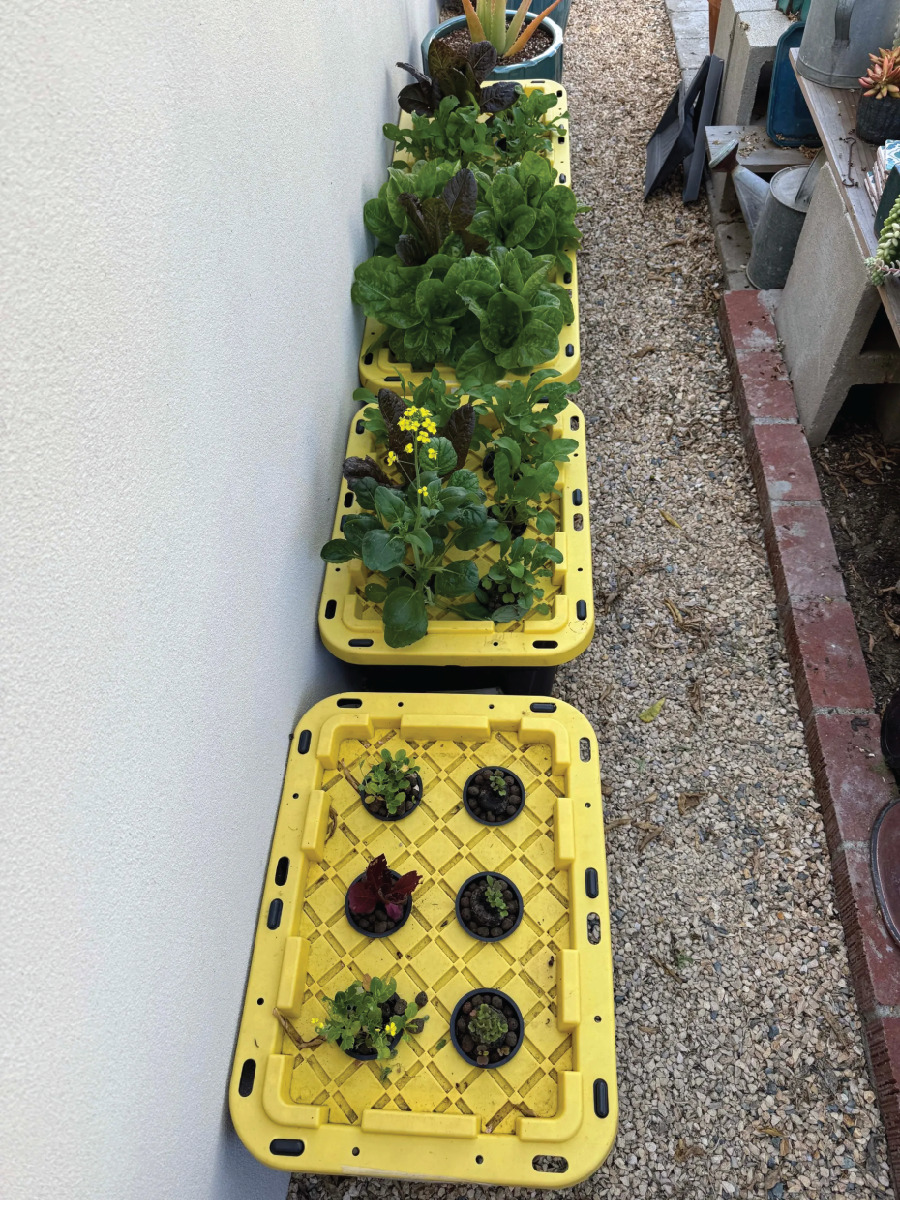
The bottom container, which had no added nutrients, hardly performed. The fertilized bins produced healthy, lush lettuce and arugula. (Leslie Crawford)
Final thoughts
Going forward, I’ll space out my plantings to avoid having too much lettuce ready at once. Sadly, sharing lettuce with friends and neighbors just doesn’t have the same wow factor as homegrown tomatoes! I did get two harvests from each plant when the leaves regrew nicely after the first cutting.
The Kratky method is a fun and easy project for kids. A Kratky kit would be an interesting and thoughtful gift for apartment or condo dwellers. Don’t tell my son, but he’s getting one for Christmas!
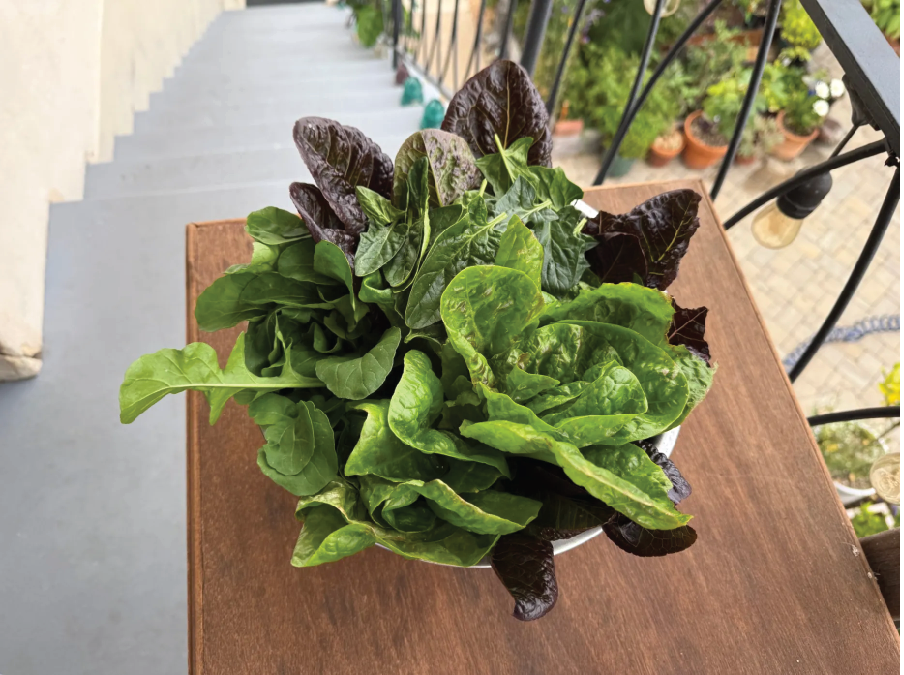
Several varieties of lettuce produced well. The arugula planting was especially satisfying because it grew easily and stayed sweet and mild. (Leslie Crawford)
Everyone can grow fresh greens. Whether you’re short on space, new to gardening, or just looking for a simple way to try hydroponic growing, the Kratky method is worth a go. Who knew hydroponics could be this easy?
Crawford has been a Master Gardener since 2010 and is amazed at how much she is still learning about plants. She loves to experiment in her garden; she plants for pollinators and she’s happy to share her homegrown carrots with her dogs.